Thursday, February 27, 2020

The Myth or the Legend of the 1200 Horse Power Hypermax 7.3 IDI


I am posting this to my blog because things get lost on websites and I want to keep it around. I had the video of the truck running, however I cannot find it or on the web now.


History of the engine: in the early 1990’s Bill Jahns began to work with Hypermax to build an IDI for sled pulling contests. Max Lagod from Hypermax built the engine. The engine ran for a season doing pulling contests but was banned from the local pullers’ association. So the engine was removed from its original chassis and was dropped into a 1969 F100 with a tube chassis, built C6 with a trans-brake and strange rear end. The truck was known as “Dadiesl”. According to one of the engine builders, the truck ran low 10’s and possibly made it down to the low 9’s as well (Which would have been the first diesel to do so, almost a decade before the second diesel to follow up that time.), lifted the front tires up twelve inches and weighted 4600 Lbs. The truck drag raced for a number of years and was driven on the street a to car shows but the owner eventually grew tired of the inconvenience of driving it (could only run during the summer with the help of others) and the truck was parked while Bill worked on other projects with land speed racing. The truck is said to still be owned by the same guy and is just sitting in some barn unused and still assembled somewhere around Joliet Illinois.

The engine details are unclear, but from what I can tell it made in the neighborhood of 1200-1500 Hp and 2500 lbs. of torque at the crank but around 900 Hp at the wheels. The block was a 7.3 sleeved down to a 6.9 and a 6-inch-thick bottom end girdle. The heads were ported but stilled utilized the pre-cup chambers, they used a stock 7.3 head bolts, however eventually Oringed the heads. The fuel system was completely custom with a P pump that did 6000 rpm’s with a compound turbo setup that made 147 pounds of boost along with nitrous and water meth injection. The engine was decompressed to 15 to 1 and would only start on ether.


As I said before there is very little known about this engine and who knows how reliable a lot of the information out there really is, However it is still very interesting this motor is. 


Beefinf up an NP205


Working on the NP205


Took the NP205 apart to clean and paint. I am currently waiting on new seals and gasket set. I had this tcase rebuild at Bayshore Truck in San Francisco. Years ago. I didn't really use the Bronco mush to the gears still look good. I am replacing the seal and gaskets.


Once the NP205 kit comes in I will clean up the gasket surface and put it together. Then the next step will be building the ORD doubler 203/205 and the Triple stick setup.


NP205 Information


NP205: Beefy Transfer Case


Info on the NP 205


The NP205 transfer case is a heavy-duty, gear-driven unit manufactured by New Process Gear in Syracuse, New York. It was introduced in 1969 and used until about 1993. The part-time, manual-shift T-case was found in GM, Ford, Dodge, and International Harvester vehicles, and in some construction/industrial equipment.
This transfer case is considered by most people to be nearly indestructible in most applications. The cast iron housing combined with beefy internals puts this case weight at nearly 140 pounds dry. High-range gearing is 1:1, and the NP205 has a low-range ratio of 1.96:1. It was offered in both driver-side and passenger-side front output versions. There were two input mounting configurations: figure-eight racetrack (as shown in the lead image) and a circular six-bolt pattern. Some versions of the NP205 have also been equipped with a gear-driven PTO output.
Ford used driver-side front outputs and a divorced NP205 in its trucks from about 1972 to 1977, then changed to a six-bolt pattern married NP205 with a 31-spline female input through 1979. Passenger-side-drop divorced cases were used on Dodge trucks in the early 1970s until a married version with the figure-eight mount pattern came along. Inputs used drive sleeves and were male 23-spline in most cases or male 29-spline when used in the diesel trucks behind the five-speed Getrag manual transmission. International Harvester also used a passenger-drop divorced version of the NP205 from about 1969 to 1975. Note that there were some other weird combinations and custom-order variations with the NP205 that are hard to fully describe, so it's a good idea to fully understand what you have in your transfer case before ordering parts.
Rear output shafts on all versions mate to a 32-spline yoke. The 1979 and older versions used a fixed rear-output yoke, while some later versions often used a slip-style yoke at the tail. Front output shafts were typically 10-spline (early) or 30-spline (late) pieces, with the crossover occurring around 1978. Some Ford and Dodge diesel NP205 cases were optioned with a 32-spline front output.
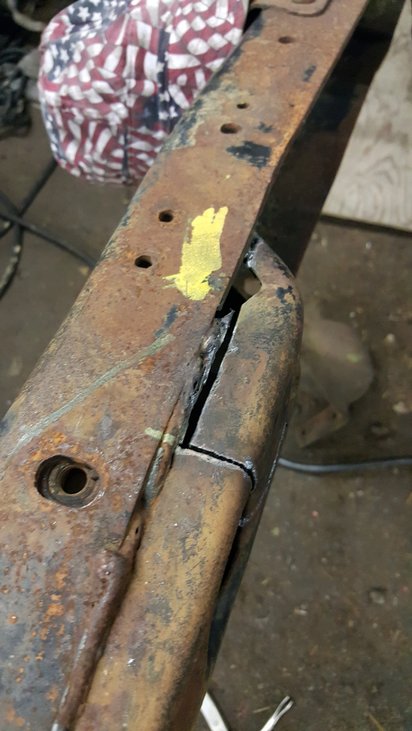
We spoke with Stephen Watson, an NP205 expert from Offroad Design who mentioned a few items to watch for when looking over an NP205 for use or during a rebuild. For starters, the needle bearing stack between the input gear and output shaft can wear grooves in both surfaces and it’s easy to miss inside the cavity of the output shaft. Check the condition of this surface. You'll often find this wear on trucks with substantial road mileage, but they were seldom or never put in low range. High-mileage transfer cases may have the problem of popping out of low range. This could be due to worn needles under the low gears or wear on the shaft and/or low gear. Cases that have been forcibly shifted into gear may show wear issues on the sliding collar teeth and corresponding teeth on the gears themselves. Note also that drive sleeves on male-input NP205 versions can wear and exhibit a sloppy fit. Eventually, the splines can strip out and fail if used under this condition.

Upgrades to the NP205 are readily available today. They include stronger shafts and yokes, shifter enhancements, and lower gearing options. Another big benefit of the NP205 is the fact that it can now be fitted to many more powertrains. There are the OEM adapter components, but aftermarket vendors have added new adapter components to put the transfer case behind an even wider range of transmissions. The NP205 was manufactured as a stout drivetrain component and, with aftermarket support, can handle most anything an off-roader can throw at it.


Break Down


12175       Screw
12176       Retainer, Input bearing
12177       Gasket, Input retainer
12179       Bearing and snap ring, Input
12181       Ring, Retainer Input brg.
12183       Pin, Thrust washer retainer
12184       Spacer, Output gear roller
12185       Gear, Rear low
12186       Bearing, needle
12187       Gasket, rear retainer
12188       Breather
12189       Retainer
12190       Washer, Thrust
12191       Roller 
12192       Ring, retainer
12193       Pin, fork lock
12195       Washer, pilot roller thrust
12196       Clutch, sliding
12197       Gear, input drive
12198       Screw and L/W, front & rear retainer
12199       Gasket, Oil Seal retainer
12200       Oil seal, rear
12201       Yoke, rear out put 1310 series
12202       Washer
12203       Nut
12204       Gear, speedometer drive
12205       Retainer, oil seal
12206       Screw and L/W, rear retainer
12207       Screw, poppet
12208       Gasket
12209       Spring
12210       Ball
12212       Gasket, PTO cover
12213       Cover, PTO
12214       Screw and L/W, PTO cover
12215       Cotter, Link Clevis
12216       Clevis Pin, Shift rail link
12217       Rail, rear shift 12218       Rail, front shift
12219       Oil seal
12220       Link, shift rail
12221       Pin, Interlock
12225       Retainer, front bearing
12226       Filler and drain plug
12227       Transfer case housing
12228       Cone, idler gear bearing
12229       Shim, idler shaft bearing
12230       Cup, idler shaft bearing
12231       Spacer, idler gear bearing
12232       Gear, idler
12233       Shaft, idler gear
12234       Gasket, idler shaft cover
12235       Cover, idler shaft
12236       Screw and L/W, Idler shaft cover
12238       Gear, front wheel high
12239       Shaft, front wheel output
12240       Needle bearing
12241       Retainer
12242       Bearing and snap ring
12243       Roller, pilot
12275       Magnet
12284       Gasket, front retainer
12286       Gasket, rear retainer
12350       Washer, thrust
12351       Shaft, rear output
12352       Ring, pilot roller retaining
12353       Seal, input shaft
12354       Fork, shift
12355       Plug
12357       Oil seal, front
12358       Guard
12359-10  Cv front out put yoke, 1310 series
12359-30  Cv front output yoke, 1330 series
12361       Nut, yoke
R205FD   Master rebld kit, bearing, seals and gaskets
205SPK   Small parts kit

Sunday, February 23, 2020

mock up of the idi mounts


The Mock up of the Bronco IDI Mounts done by Craig Montague ie Muddy74Ford.

The following is all from Craig's Post

So, to start off the first thing you should be doing to your Truck before thinking of building Motor Mount plates or swapping an IDI into your Truck should be to first Source your Engine and Transmission. The C6 and E4OD for the IDI shares mountings with the 1970s Trucks up until the Bell-housing patterns, the IDI shares upper Bell-housing bolt pattern with ford "Big Block Bell patterns, but the other 4 bolts will not match up and I do not suggest drilling these holes to fit, source yourself a Diesel Transmission in this case and don't shortcut. The T19 4 speed that came in the IDI Trucks will share the same mountings as 70s Trucks, but will require use of the aluminum Adapter Center Housing from the T19 to a Married T-case setup, in a Divorced T-case application use a 2wd T19. Also another option is to use the Aluminum T19 Bell-housing from the IDI Truck on your current T18 or NP435 4 speed Transmission, in this build the original NP435 will be used. In a NP435 build I strongly suggest sending your Transmission input off for Cryogenic Treatment/Hardening if building for Performance. Any Manual Transmission will require converting to a Hydraulic Clutch which I will cover more later. The only other options are for a ZF5 or ZF6 transmissions, these have an extra degree of difficulty as you will need to notch the front of a Married T-case Application and will need to drill the cross-member for the ZF5/6 mount, also all applications will need either a custom Transmission Floor pan Cover or a minimum of a 2" body Lift to clear the extra height of the Transmission, I will not be covering the ZF5/6 in this posting.

Now that all that has been covered the first step you should perform is to disassemble the front Clip of your truck (be prepared to soak some bolts overnight folks in the rust belt), you will need to strip your old motor down to just the Block, Heads, Crank Pulley, and water Pump (etc.) the more the better. You will be measuring and leveling your frame and old Motor before removing it, it is important to level your frame to the ground and have your tires off the Ground for this, in the following photos you will notice I am using Adjustable Welding/Pipe Jacks (Airgas is a great place to pick these up) to lift and level all 4 corners of the bare frame (in this case) this will come into play later to properly level your new motor.

Lifting and leveling the Frame with Pipe Jacks:


Now obviously I do not have an Engine, Trans , or T-case mounted to my bare frame, so here it is all mounted back up:


Making sure that your engine is level is also very important, you also want to be sure to find the proper angle that your Engine is slanted from front-to-rear also with a Magnetic Protractor (available at most Hardware Stores) on a properly flat surface. This will be VERY important later as you will need to match this level and protractor angle with the new IDI Motor or you will run into drive line angle issue, you MUST match your old engine's angle and center.


Now is the perfect time to find your crank center and measure your frame at a marked location to center your IDI engine later, as you will see in the following photos I make corresponding marks on the Bronco and F100-F150 cross-members that marks where the Crank Center is oriented in relation to the Cross-member. The IDI is a bit longer than the 351m that came in this Bronco, so my marks will come into play and make more sense after the IDI is mounted. At the point of measure the crank was centered at 15.5" from the passenger side of the frame, at the point of measure at the Cross-member the center is 15.25".


So now that the crank/engine center and angle has been found there is no need for the engine or Motor Mount towers to be in the Chassis anymore, if you have coil Buckets and Shock Mounts you will also want to remove these from the Frame at this point.

The first thing that needs to be done is to notch an small area of the Frame just inside the passenger side of the Frame, this area needs to be notched out before making your new Motor Mounts as it will be needed to clear the Starter Solenoid for the IDI, even if you are using the smaller replacement Starter or the aftermarket mini Starter you will still want to make this same notch in the Chassis.


After you have made that reference mark and removed the mount now you need yo make another reference mark that will mark your horizontal cut, from the top of the frame (the lower part of the frame-rail that is the half your mounts bolt to, not the highest point of the frame-rail in thus case) measure 3" down and mark the outer portion of the frame relief hole as shown below.


Now that everything is marked and set to cut I will be using the combination of Plasma Torch and Die Grinder, there will be a bolt sleeve/brace under where you are cutting, so just be prepared for it.


This will be the end product of this cut, the notch will allow any Starter to clear the chassis, and I have a quick and simple way to mare these cuts with nothing but a paint pen, straight edge, a level, and a tape measure. To make these cuts I would highly suggest a Plasma torch and/or a Die Grinder.


Now, to cut this notch I have a great way to not only measure the correct location for this notch, but a fast and easy way to find the proper level for the vertical cut using the old Motor mount. Placing the passenger Mount back in it's old location on the chassis run a vertical mark on the frame on the firewall (back) side of the Mount, you can now remove the Mount and you should be le with, well... a vertical mark of which to measure out from. In my case I outlined the entire mount just for future reference.


After you have made that reference mark and removed the mount now you need yo make another reference mark that will mark your horizontal cut, from the top of the frame (the lower part of the frame-rail that is the half your mounts bolt to, not the highest point of the frame-rail in thus case) measure 3" down and mark the outer portion of the frame relief hole as shown below.


Now using the vertical Mount mark as a guide measure 2" forward on the frame, this will be the actual vertical cut for the notch, I tend to use a level as a straight edge to check the level and also mark the vertical cut because I'm OCD... but another good little tip for this cut is to clamp a piece of 2" angle iron to the chassis using a welder's clamp, just makes for a good guide for a plasma torch.


Now that everything is marked and set to cut I will be using the combination of Plasma Torch and Die Grinder, there will be a bolt sleeve/brace under where you are cutting, so just be prepared for it.


There will be a tack weld that will still keep the trimmed piece of Frame onto the Brace underneath it, to break it free just grab the steel with a pair of pliers and wiggle (yep, that's a technical term haha) back and forth until the weld breaks. After removal keep the trimmed piece off to the side for later use and using a straight edge mark and then cut the bolt brace square with the remaining portions of frame.


Make sure to true up the edge of the Frame-rail before cutting the brace, then cut. The Frame should look like this afterward


Make sure while doing all this you do not neglect the Shop Dog, Cabela here was not amused with all my hard work 


So using the same sized steel stock (you can trim off the old Driver's side Motor Mount if you want) make a square piece of Stock for the front facing side of the notch, then tack weld it in place (important to get the lower corner tacked, don't forget it), using the left over stock from the notch cut trim the steel and flatten the leftover metal out and fit it to where the old metal was cut as shown, weld it all in and then make a plate for the base and you are ready to drill for the bolt. DO NOT.FORGET TO PUT A SMALL TACK WELD ON THE BOLT BRACE TO KEEP IT IN PLACE!


After all that cutting and welding you now have you place the Passenger Motor Mount back up and use a proper Center Punch to punch a deep Punch mark to allow for a Drill Bit to keep fron wandering when drilling the bolt hole for the Shock Tower Mount. After drilling this hole you will no longer need the original Motor Mounts, but be sure to test fit the new Bolt hole with the Motor Mount still on before discarding it. You are now done with the Starter Notch.


So now that all the notching is over with we can finally get to Motor Mounts and getting this engine mounted up. But first thing is first, we have to get something to mount everything to. In this case I will be reusing the original NP435, mostly for the fact this will be used as a Trail and Offroad rig, and with the incredibly low 6.68 1st gear it provides a truly amazing gear combination for Trail use. To adapt the NP435 all you need to source is the T19 IDI Aluminum Belhousing, the T19 being loosely based off the T18 casting makes it a perfect match for the Transmission to Belhousing Bolt Pattern as the NP435 and T18 were used interchangeable on the Ford Assembly lines in the 70s, also the Input Shaft splines and Bearing collar also happen to share with the IDI making it a great Transmission for adaption, the only concern is the input shaft is a little undersized on the NP435 as compared to the T19, but with this build we will be sending off the Input Shaft out to be Cryo Treated to give it some more strength to put up with the IDI's abuse. If you are not looking for the extra low gear the 4wd T19 can be adapted in place of the NP435 and mated to the NP205 quite easily, same goes for the ZF5 for the most part, but extra fitting and trimming will be required at the cross-member for that swap, you will also need either a custom trans tunnel cover or perform at least a 2" body lift on your Truck/Bronco to swap to the ZF5 due to the extra height, I will cover this more at the end of this posting and for now focus on the 4 speed. All these measurements will not differ due to the transmission used.

Here is the NP435 still mated to the NP205 and with the T19 IDI Bell installed:


Before mounting the motor the first thing that you are going to want to do is cut your Motor Mount Base Plates, using 3/16" steel cut 2 large plates at 9"x5-3/4" (9"x5.75") and then 2 small plates at 9"x3-1/2" (9"x3.5"). These will serve as the base for both the Driver and Passenger Motor Mount plates.

You are going to want to place these plates on the frame and have the forward edge (always in Driver's perspective) of the plate measure at 24-1/2" (24.5" you get the picture) to the center of the top Bolt Hole for the bumper as pictured below, make sure to properly square the plates and leave yourself enough gap for a proper weld, in this case I photographed the top plate with torch marks still on it, you are going to want to clean this up to avoid air pockets in your bead, in this case i just took the photo with it.


After welding each plate allow it to cool and remove it from the frame rail, now you can stitch-weld the backside of the joint for a little extra insurance, after this clamp the mounts back into their original locations and be sure to reorient them to their forward edge at 24-1/2" to the upper Bumper Bolt center. Make sure the mount is tight to the frame on both plates as this step will involve some important drilling.


After properly clamping your plates to the frame and checking your 24-1/2" measurement you can start drilling out the frame holes in the Mount plates, drilling the plates from the outside of the Frame to the inside slowly with a good long Drill Bit you will have 6 holes on each mount in which to clamp the plates to the chassis. Be sure you drill the Shock Tower holes to the proper size as each shock tower has a larger lower bolt on the better majority of them. You can confirm this by looking at the holes drilled int the shock towers. After you have completed this make sure your coil buckets (if you have them of course) bolt up properly with the mounts bolted up.


So moving on from the Base plates, now that they are made you will need a Paint Pen or Welder's Chalk and a Square to mark out where the 2 top plate Bolts are going to go on your Motor Mount Plates. Start by first marking out the center of the thread-holes along the length of the Frame, make sure to mark along the Frame farther out than your Motor Mount Base Plate will cover so you can reference it later. After you make that mark press the Square against the outside of the frame and center the square to your holes again and your marks should look just like below.


Now that everything is marked and mocked up you can put the Motor Mount Base Plates back onto the chassis and lightly snug them up using their fastener (too tight and you will preload the plates), now using the marks from earlier use the Straight Edge on the Square to transfer the marks on the Chassis to the plates so you can drill the 2 holes for the top of the Plates. Use a center punch to mark the intersection of the lines and this will be your point to drill, drill slowly with a good 1/2" Machine Bit and after cleaning everything out/up tighten up all the fasteners (making sure all the fasteners are in) to keep the plates square while Welding later.

Now that you have tightened all the fasteners you need to move on to installing the new IDI Motor, this engine will be a bare Mock-up engine, you do not HAVE TO have the engine torn down to this point but in this case this 7.3L IDI will be used in a following 1979 F350 Chassis Cab swap, so it is bare and ready for the Machine Shop to be built, so it will make for a good mock-up example.


The NP435 has the T18 bell installed and I have the Chassis-side Motor Mounts from the donor Truck sitting on the side at the ready. After getting everything bolted up and secured you need to use the Angle Finder and level to place the IDI back at the same angle and level as the old engine was (in this case 8 degrees) make sure to double, and even triple check the level and angle and be sure the Chassis and Engine do not shift and are still level. THIS IS THE MOST IMPORTANT PART OF THIS SWAP.

In most cases with the Transmission and Transfer-case mounts all bolted up properly the engine should already be pretty well centered in the chassis after you level it all out. But measure just to be 110% sure.


Now to get to fitting the Donor Truck's Motor mount plates now that you have centered and leveled the motor, now as you can see the plate will be curved towards the top for the Passenger's side and will have a dip and angle added on the Driver's side. Now since the Passenger's side is usually the easiest to make I like to start with it so I can be better prepared and "warmed up" for the Driver's side later. Take the mount before installing it and flatten it out by either placing it on a strong and flat surface and pounding it flat with a 4 lb hammer, or through whatever means you can find without heating the mount with a torch. I usually just pound it flat on the welding table.


So I finally managed to get some shop time in and get to taking photos of what I had apparently not with the Motor Mount Plates, so on with the write-up!

So to work with the Motor Mount Plates you must first bend them flat (this is a little more difficult with the Driver's side than the Passenger Side so I will cover the Passenger first), I did this by clamping the Mount on the short side of the bend and literally pounded it out with a 4 lb hammer until it was mostly flat, then used the same hammer to flatten it the rest of the way on the flat surface of the Welding Table.

Then after making sure the Plate was flat I proceeded to secure the Motor Mount to the Mount Plate and clamped it using the Factory nuts, making sure the mount was seated properly and square to the mounting holes, I then traced out with a permanent marker the outline of the Mount and measured out 1/4" from the edge of my mark which will correspond with the back edge (transmission side) of the Mount. When removing the Mount you will be left with a near perfect cutting outline of which to trim the Plate with.


Now to get around to making the actual towers for the Mounts, what you need here is some high quality Cardboard and a good razor knife and after making sure your engine and chassis haven't shifted out of place mount up your Motor Mount Plates and get to figuring out your towers, I almost always start with the Driver's side since the pieces are the smallest, work out the proper shape of the cardboard (this may take a few pieces) and be sure you leave some overhanging the Chassis Mount Plates so you have some metal on the top to add some rigidity. As a great fabricator old me, if you can't work out something in Cardboard, you can't work it out in Metal.

Here is the forward plate, keep in mind to have enough gap to allow for the bead to fill the welds.


Here you can see the Front Plate made from the outline of the cardboard mounted and Welded, don't worry if the Plates look crooked or not square, that's how they should be. I like to also square my tower plates to the Engine mount plate using a 90 degree Square or Protractor then keep it in place with a good welding magnet as shown below.


Repeat the same steps for the rear plate and you have most of your Passenger Mount made.